
When was the last time you gave your kitchen a thorough and deep cleaning? If you haven’t done so in recent months, now might be the time to strike!
Dirty kitchens, no, dirty and unkempt houses in general, are a bit of pet peeve for us. Our OCD senses tingle every time we see clutter, grease build up, dust, and mould in any area of the house, especially in the kitchen. But as cleaning experts, we also find ourselves giggling in excitement. Because that’s an opportunity to do what we ultimately love: cleaning!
Of course, we can’t force you to look at one of the most tedious jobs in the world with the same affection as we do. We can only give you the best kitchen cleaning tips and helpful hacks so you can somehow experience the true joy of deep cleaning your kitchen.
On that note, below is a kitchen cleaning strategy that we’ve been employing for as long as we can remember! Don’t worry, it’s as easy as ABC, literally! This will help you memorize everything that must be cleaned so you won’t leave any stone unturned. You can get your little ones to join in the fun, too, and let them learn their alphabet through basic chores.
A little heads-up, though. This is in no particular order, and you should do this after you’ve done some basic decluttering. Everything’s a breeze when there’s no clutter that gets in the way.
Are you ready, kids? We mean, Mum & Dad?
A is for Appliances

Your small appliances and electronics are probably some of the most used tools in your kitchen. These gizmos that make cooking a lot easier and fun rightfully deserve some cleaning. Some of these appliances like the blenders, juicers and coffee makers are built with detachable containers or racks so you can easily soak and wash them in soapy water.
On the other hand, the bodies of these appliances that house the electric components must be cleaned only with a clean cloth, dipped in hot soapy water and dried with a separate clean towel.
B is for Bakeware
For most people, the fun of baking stops when it’s time to remove all the flour, oil, and other mixes that have already turned into goo and gunk. But what most people forget is that these grease and grime build-ups are preventable in the first place.
After use, always soak your aluminum or stainless-steel pans and other smaller bakeware like measuring cups and strainers to soften up all the residue. Then scrub gently to remove all the grime. Avoid using steel wool in scrubbing your glass and stainless steel pans as much as possible, this will avoid scratching these dishes.
Lastly, treat them to a soapy bath! Then rinse with clean water and dry them immediately with clean napkins or tea towels.
C is for Cabinets and Cupboards
Ideally, the insides of kitchen cabinets must be deep cleaned at least once a month. Just prepare the cleaning cloths, old toothbrush, and all-purpose cleaner.
Now, we know what you’re thinking. Emptying out all the shelves, just to put all the kitchenware back in may sound more laborious than the cleaning itself. But unbeknownst to others, there’s actually a smarter way to do that. Who said you should do it all at once, right?
For sure you have dedicated shelves for your pots and pans, drinking glasses and plates, canned goods, etc. Simply start with one shelf then go on to the next in the succeeding month. Just make sure to keep track of all the shelves that you’ve already cleaned.
D is for Dishwasher
Hate to break it to you, guys. Contrary to popular belief, a dishwasher doesn’t clean itself as it washes your dishes and utensils. Residue like food bits, undissolved detergent, and grease will eventually build up into grime in your machine’s filter. Unpleasant spots and odour will also appear over time, if left unnoticed. To prevent all these, here’s how you should take care of your dishwasher:
Everyday:
From now on, make a habit out of removing all of the leftover food bits with a paper towel to avoid that funky smell and gunk build-up.
Every week:
Clean the filter. Rinse it under hot running water. Make sure not to leave any pesky dirt and grease behind by scrubbing the mesh screen with an old toothbrush.
Every month:
This is the right time to get down there and get dirty. You can either use dishwasher cleaning tablets or your own DIY white vinegar and water solution. Just make sure to reach every nook and cranny for a more satisfying result.
E is for Exhaust Fans
If not cleaned regularly, your exhaust fans are a potential fire hazard. To keep it up and running smoothly, you need to de-grease it. Disclaimer: cleaning your exhaust fan will definitely leave you exhausted, pun intended (wink).
Step 1: Unplug the device.
Step 2: Remove the range hood filter.
Step 3: Submerge it in a hot mixture of dish soap, baking soda, and water. Leave it there for 20 minutes. Then gently scrub the grime off.
Step 4: Rinse it with hot water and dry.
Step 5: While waiting for your filter to dry up, wipe the grime off the inner walls and blades of your exhaust fan with a soft sponge and an all-purpose cleaner.
Step 6: Put everything back on, and you’re good to go.
F is for Floor

Whether your floor is made of vinyl, ceramic tiles, laminate floors, wood, or marble, they’re all susceptible to grease and dirt. Thanks to the food bits that often fall from your plate or spoon every time you cook. But don’t worry, they can be easily removed with the right tools and solutions. Just make sure not to use a brush that isn’t too abrasive. The last thing you want to happen is to damage your floor in the process, instead of bringing a new shine to it. Try keeping a dustpan handy in your kitchen to do a quick post-cooking clean.
G is for Garbage Bins
It’s an unspoken rule that if the bin’s already filled up with garbage, it must be disposed of immediately and properly. Just leaving this here in case someone forgot.
H is for Hobs, Knobs, and Stove
If the kitchen is a stage, then your stove is the star. Regardless of its place here in this list, it’s certainly the main event of the day. It’s where the action and magic happen in the kitchen. So it rightfully deserves a thorough kitchen clean.
The best way to keep hobs, and knobs sparkling clean is to wipe them off after every use. And that’s the easy part.
On the other hand, if the burner heads and caps are too grimy to handle, you will need a mixture of dishwashing soap and/or baking soda and hot water. Soak the burners and caps in that solution for 30 minutes and start scrubbing away the softened-up dirt with an old toothbrush. Let the dry properly before reassembling them.
I is for Ice Cube Tray
The ice cube trays in your freezer should be cleaned at least occasionally. We know bacteria cannot grow in freezing temperatures, but have you ever noticed when you grab some ice it might have a strange taste? That’s because it can absorb food odours, so if you haven’t used your ice for a while, it might be time for a quick clean. And every time you defrost your freezer, or do a fridge deep clean, that’s the best time to clean the trays.
J is for Jars
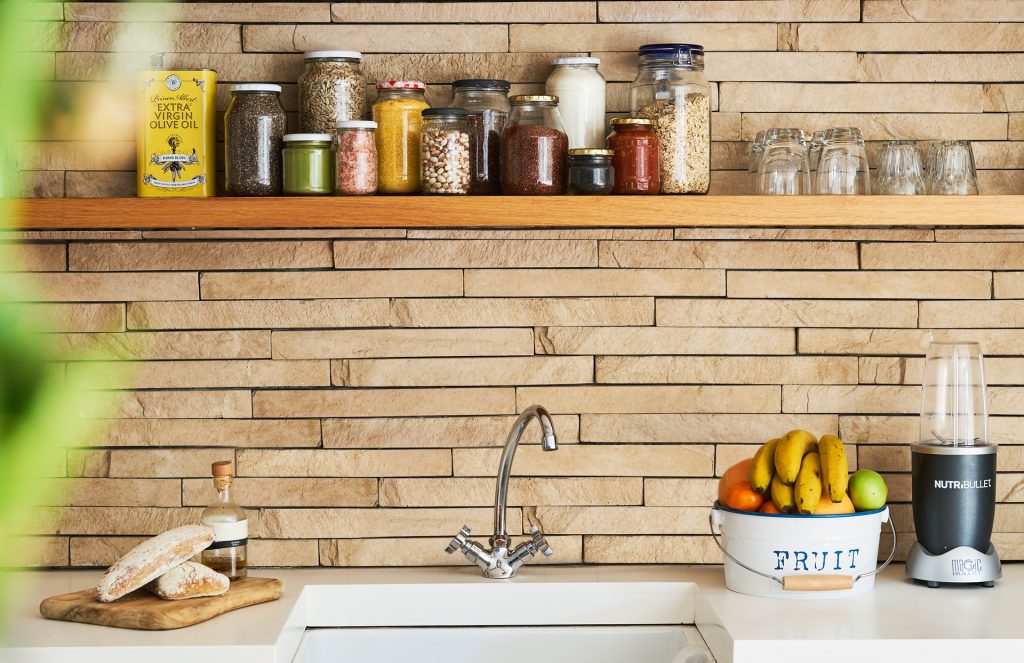
We don’t know why, but jars and other containers are big fans of dust. And obviously, we’re not. Regularly wipe them with damp and dry clothes to get rid of the dust.
K is for Knife Set
Our knife sets are usually in a knife block, which is out in the open, and with all the action in the kitchen, dust, grease and grime can come to rest on them. However, knives are easy to maintain in terms of cleanliness. You can just wash them with regular dishwashing soap. Rinse them with water and you’re good to go.
L is for Large Pots and Pans
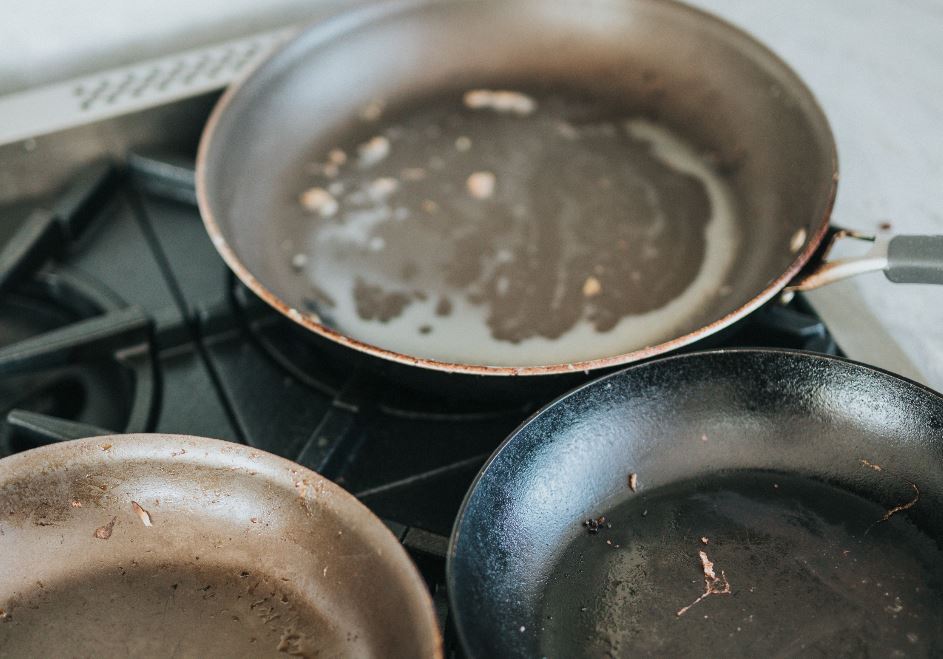
Trailing behind the stove, pots and pans are probably the second grimiest kitchen tool. What makes it even more difficult to clean is the fact that not all pots and pans are created equal. Some are made with copper, aluminum, stainless steel and other materials. Depending on what material you’re washing, a variety of strategies must be used to remove the grease without inflicting damage to the cookware.
Stainless Steel
After scraping off the food bits, you can simply wash the stainless-steel pots with water, mild dishwashing soap, and soft sponge. Never use steel wool or any abrasive products!
Cast Iron
Unlike with the regular pots and pans, cast irons aren’t friends with dishwashing soap. Just wash it with regular water while it’s still warm then dry it to prevent rust formation. But it doesn’t stop there. You must season your cast iron to naturally create a protective layer over time. Here’s how:
- After washing and drying, apply vegetable oil to the surface.
- Heat the cast iron in the oven at a low temperature.
- Take it out and let it cool down.
- Wipe the oil residue with a clean paper towel.
Ceramic
Ceramic-coated pots and pans are naturally non-stick. But when high heat is used in cooking, food may stick to the pan, making it a tough job for the dishwashers. Here’s what you must do:
- Allow them to cool down first.
- Wash them with warm soapy water and soft sponge.
- If there are burnt food bits in the pan, don’t try to scrape them off with steel wool.
- Soak them first in hot water.
- Then put some baking soda on the surface, leave it there for 15-20 minutes.
- By that time, you’d be able to lightly scrub off the stains.
M is for Mitts and Potholders
Smelly and dirty oven mitts and potholders? You’ll be surprised at how quickly these can become dirty. Keep an eye on them, and if you’ve had a spill throw them into the washing machine and let the tumbling begin.
N is for Napkins
Receiving guests into your dining area always looks posh and legit with the tablecloths and table napkins smoothed out into place. So make sure to wash them first either by hand or machine. Use cold to warm water temperature and regular detergent.
If you’ve had guests over, make sure you wash the napkins after their use, if its just you using them, if you haven’t gone to town on that napkin, you should be ok to use it for a few meals.
O is for Oven
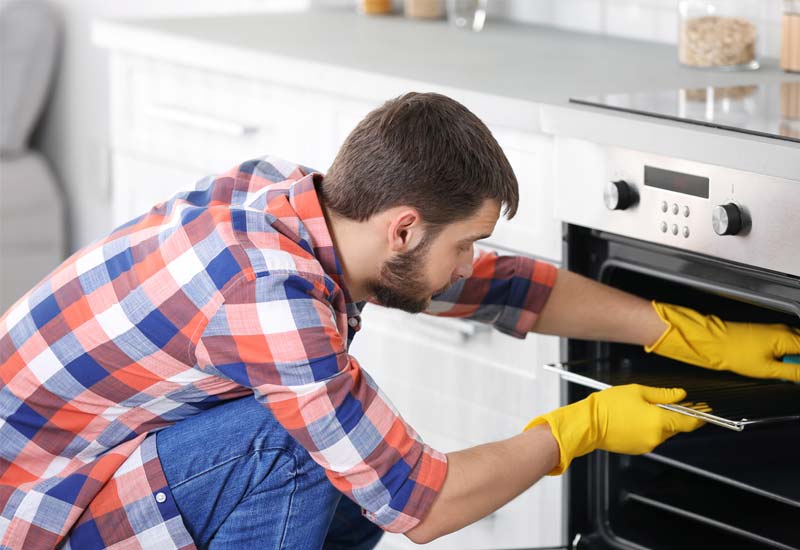
As a general rule of thumb, especially for those who regularly bake, ovens must be cleaned once every three months. But sometimes, you just have to be wary of the telltale signs that your oven already screams for attention:
- Appearance (is the door already covered with grease and grime?)
- Odor (does a stanky, abhorrent smell linger as you open the door?)
- Smoke (ovens shouldn’t emit smoke, so it’s a bad sign)
Once you see these signs, roll up your sleeves cause it’s time to work. If you already have store-bought cleaning products, better. Here’s how to bring back the original shine and fresh smell of your oven:
- Detach the racks, pizza stone, thermometer, and any other extras you may have in your oven.
- Lay some newspapers flat on the floor just beneath the oven.
- Wear your gloves and safety glasses. Then start spraying around your store-bought cleaner around the oven, top to bottom, side to side, and every crevice of the oven. Shut it closed when you’re through.
- Let the cleaning solution sit for 20-30 minutes. See the instructions on the label.
- While waiting, take the racks outside, spray them with the cleaner, place them inside a garbage bag then tie the bag shut. Leave them for a while.
- Once 20-30 minutes have passed after spraying the insides of the oven, get your damp cloth and start wiping down every nook and cranny of the oven. For the grime and dirt build up, use microfibre sponge or any other abrasive tools. Make sure not to leave anything behind.
- Don’t forget the racks. Remove them from the bag, rinse them in the sink with warm and soapy water. Dry them with a clean towel and put them back on!
- Congrats, you crushed it!
Check out our deep cleaning oven guide here for some more information.
P is for Pantry Area
Whether you have a dedicated room or just a few shelves for storing your food, you still have to clean and organize your pantry. Here’s how to make your pantry sparking clean and clutter-free:
- Remove everything from your pantry: packs of food, jars of spices, bottles of condiments, etc.
- Wipe the cupboard shelves, and other surfaces with a sponge soaked in hot and soapy water.
- Dust off the jars and containers.
- Put them all back in, in an organized way of course. Store items with the same purpose altogether and label them. For example: spices, condiments, jams and spreads, canned goods, etc.
Q is for Quarantine Haul
Last year was hard for all of us. But it’s already 2021, and it’s about time to let go of the cruel 2020 and every unnecessary thing that came with it. Yup, including your quarantine haul.
Giving in to the online flash sales and free delivery promos last year was completely understandable. Because we literally had to find anything that will keep us cheered up and motivated. But now that we’ve somehow recovered, channel your inner-Marie Kondo and take a look at the kitchen tools and gizmos that you’ve hoarded.
Were they really helpful at all? No? Resell or donate. Will you actually use them in the near future, and regularly? No? Resell or donate. Will they just take up too much space in your kitchen? Yes? Resell or donate.
Let them go, my friend. Let them go. Only after doing this that you’ll realize how much it truly sparks joy.
R is for Refrigerator
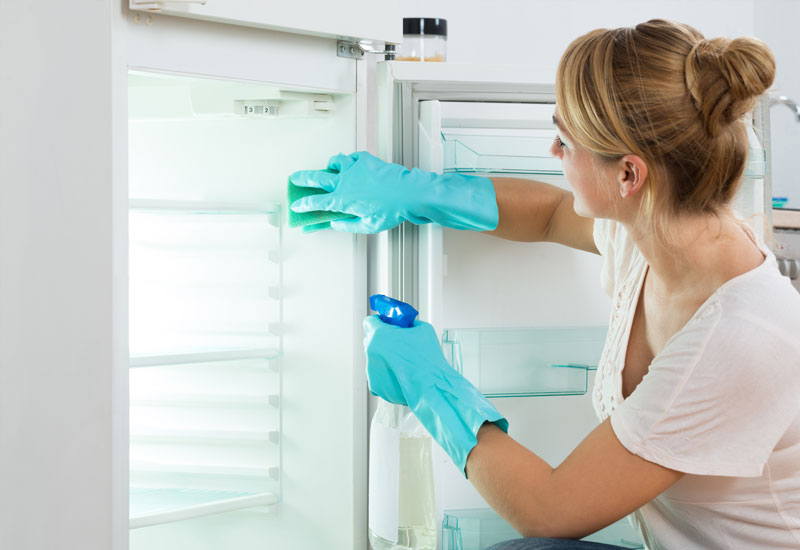
Your refrigerator is one of the workhorses of your kitchen. And you’re probably giving less attention to it more than you should. Give your fridge some love and keep it in tiptop shape inside and out with the cleaning routine below.
But first, move all your goods and frozen foods to a cooler then you’re good to go.
- Remove the shelves, wire-racks, drawers. Then soak and wash them in hot water and mild dishwashing soap. For the glass parts, let them sit for a while before soaking in hot water, or else, they might crack.
- Clean the interior of your fridge with a solution of baking soda and water (1:7 ratio). Wipe the insides, from top to bottom, with a cloth. For the hard-to-reach areas, use an old toothbrush. Once you’re done, wipe everything with a towel.
- To remove any stinky odour, fill an open container with baking soda and leave it on the bottom shelf.
- When everything’s cleaned and deodorized, it’s now time to put everything back in. Declutter and organize as you refill your fridge.
Check out our article on Deep Cleaning the Refrigerator here.
S is for Sink
If smartening up a kitchen is a video game, the sink is the boss or master level. But you can still crush it with a few tricks and combos up your sleeve. Before taking on this tough job, make sure to completely clear it of food bits, and dishes. Once done, suit up!
Coat the stainless-steel sink with baking soda, wet your sponge with hot water and dish soap and scrub away! Remember that you’ll have to change your cleaning solution and strategy, depending on what material your sink was made of.
- Lemon and salt for porcelain sinks
- Hydrogen peroxide and baking soda for white kitchen sinks
For more sink cleaning tips, check out our article on How to Scrub Your Sink and Keep it Sparkling Clean.
T is for Tables and Countertops
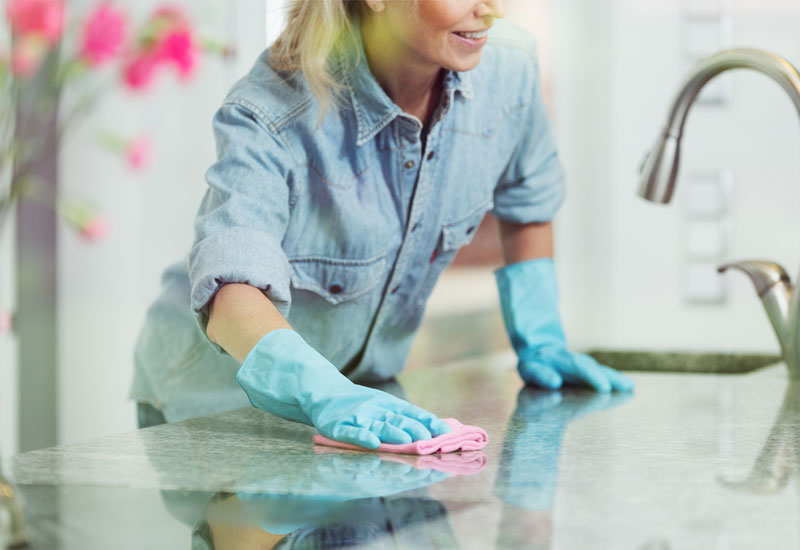
The kitchen is supposed to invite people in. But with messy, or worse, grimey tables and countertops, driving people away is not unlikely. That’s why you have to regularly clean and declutter your countertops. What’s the use of having a smooth and show-room quality granite or marble tops if they’re all littered with clutter, right?
U is for Utensils
Washing the utensils and dishes is not rocket-science. But why does it always seem to be the toughest job? There’s a saying: Everyone wants to save the world, but no one wants to do the dishes. Which is quite true.
Well, maybe because no one really wants to do anything after a good, hearty meal. In addition, the unwashed dishes from the last meals make it even more discouraging. But if you have a dishwasher, that’s a problem half-solved right there! But if not, you might want to get up and get that dish soap bubbling.
V is for Vents
If your kitchen has vents installed in it, make sure that it stays free from build up of dust, fur, hair or spider webs. Your air vents bring in clean air to your home so it’s only right that the air ducts are also clean. Although you only have to do it once every 2-5 years, you still have to do it right:
- Turn the power off.
- Remember to wear dust masks or goggles to protect your eyes and nose from the microscopic particles.
- Unscrew the covers and remove the dirt and dust with a brush before washing them with soap and water.
- Vacuum it to suck all the dust, pollen, and other allergens. You might need to rent or borrow a heavy-duty machine on this one.
X is for (e)Xpired Substances
We tried, okay? There are not many useful words that start with X, you know!
Anyways, going back. The last thing you want to happen is for you or anyone to get sick from food poisoning, just because some expiring item slipped your attention. Always keep an eye on the labels on your products. Once you see an expired item, in the trash bin they go!
Y is for Yellowing Containers
Not many things are more annoying than a discolored plastic container. No matter how hard you scrub it, it’s so hard to bring back the original color that getting rid of it might be the best thing to do. But hold your horses, right there! Give it a second chance. Here are some tips to make that stain, stain go away!
- Baking soda is no doubt an all-rounder. You can make a paste out of it and some water, and use it as a scrub.
- When life gives you lemons, pour the juice straight to the yellowing containers! Leave it for a while and let the citric acid work its magic.
- If cloudiness of the containers is what vexes you, fill them up with some good ol’ vinegar and water mixture inside the container, or submerge them totally with the same solution.
Z is for Zip Ties, Cables, and Rubber Bands
Zip ties, cables, and rubber bands are probably the unsung heroes of this whole affair. With all the organizing and decluttering, you’ll probably need more of these. So make sure to have these and keep them handy (in that junk drawer we all have) when giving your kitchen some love and some cleaning.
Whew! That’s probably the longest version of ABC ever, don’t you think? But probably one of the most helpful, too! If you’re scheduling a general cleaning of your kitchen one of these days, just remember your ABCs and you’re good to go.
Deep cleaning the kichen is a big job, so why not have a look at our Tips & Tricks for Keeping the Kitchen Clean, to make the job a little easier, and if you’re looking for ways to keep your kitchen organised read our tips here here.
And if you’re not in the mood to get your hands dirty, you can always ask a little help from your friends, or even strangers! Pristine Home are those kinds of strangers that you want to come into your house. Because whatever cleaning task is on the table, we’ll take it and roll our sleeves up. And we just happen to love cleaning kitchens!
So, why don’t you give yourself a break and let these strangers freshen up your house and make it gleaming in cleanliness? Who knows, we might end up becoming your mates!
Call 1300 654 696 or click here to get a house cleaning quote.